
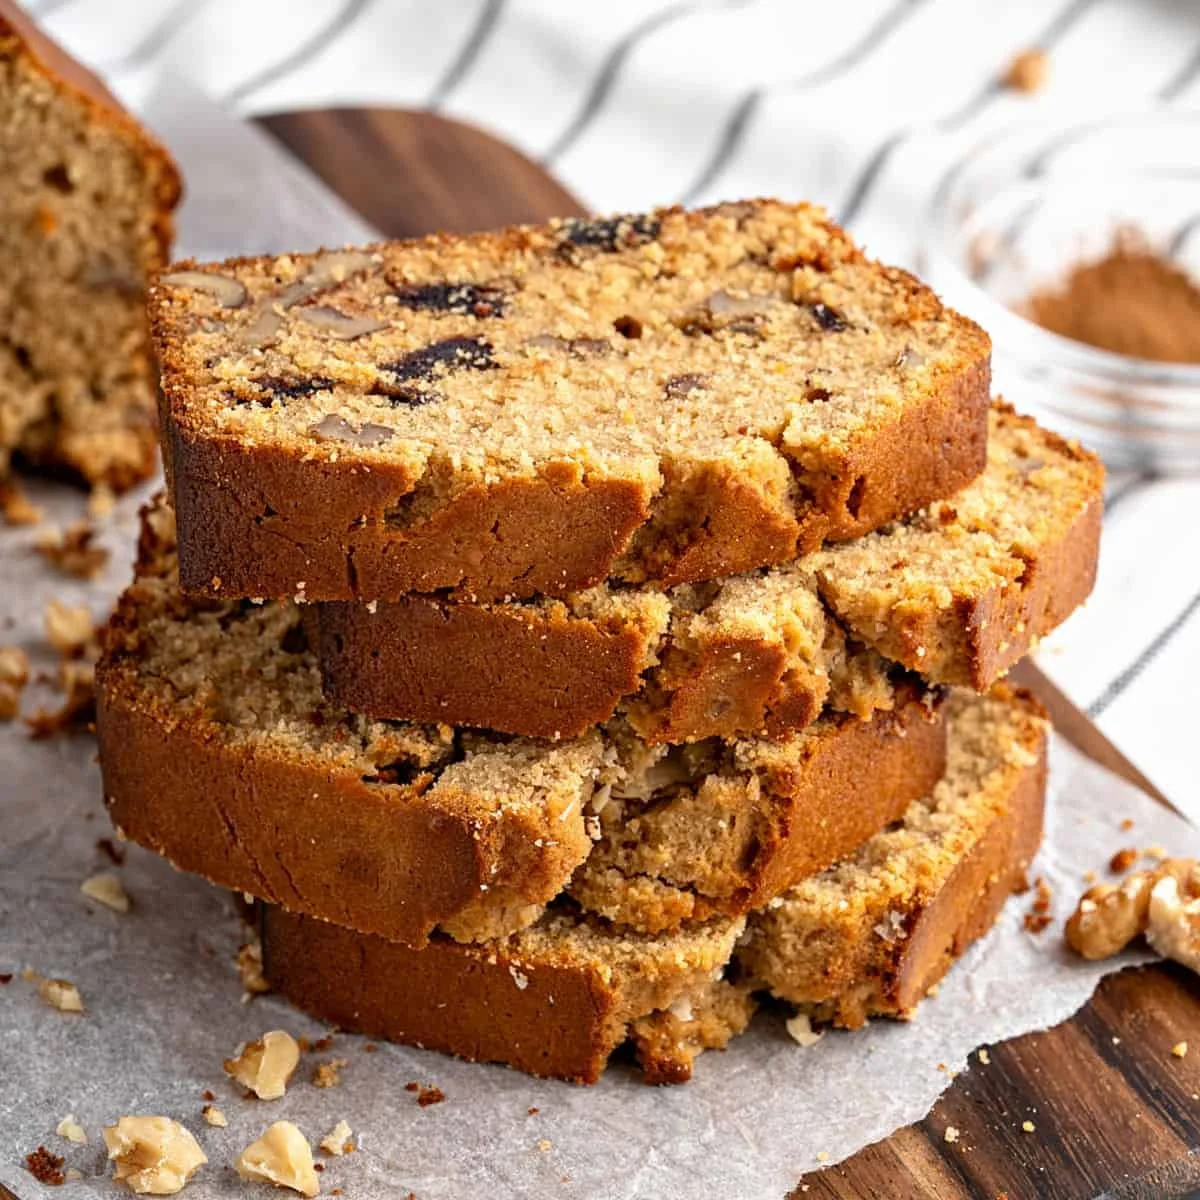
Date and Walnut Bread is a beautiful combination of rich, chewy Medjool dates and crunchy walnuts, creating a delightful bread that is perfect for any occasion. This old-fashioned recipe is not just about taste; it carries a comforting nostalgia that many of us cherish. The aroma of the bread baking fills your kitchen, reminding you of family gatherings and cozy afternoons. The essence of this recipe lies in its simplicity, making it an ideal choice for both novice bakers and seasoned experts. Let’s dive into this step-by-step guide to crafting this moist, flavorful bread.
Ingredients
Creating the perfect Date and Walnut Bread starts with the right ingredients. You’ll need:
- 7 tablespoons unsalted butter (browned, for a nutty flavor; or use 5 tablespoons unsalted butter if you prefer it unbrowned)
- ¾ cup brown sugar (packed, adding a delightful sweetness)
- 2 eggs (at room temperature for the best texture)
- ¾ cup whole milk (creamy and rich)
- 1 tablespoon honey (for extra sweetness and moisture)
- 1 ¾ cups all-purpose flour (or cake flour for a lighter texture)
- 1 tablespoon baking powder (to help the bread rise)
- ½ teaspoon salt (to enhance the flavors)
- ¼ teaspoon ground ginger (for a hint of warmth)
- ¼ teaspoon ground cinnamon (adding a touch of sweetness)
- Pinch of fresh nutmeg (for aromatic warmth)
- ¾ cup walnuts (lightly toasted and coarsely chopped for crunch)
- 5 ounces Medjool dates (pitted and cut into chunks; these provide a rich, juicy sweetness)
- 1 teaspoon vanilla extract (for added depth of flavor)
Step-by-Step Directions
Follow these detailed instructions to create your Date and Walnut Bread:
- Preheat your oven to 350ºF (180°C), ensuring it reaches the right temperature for baking.
- Grease a non-stick 8×4-inch loaf pan. Line the bottom and the two short sides with parchment paper for easy removal.
- Brown the butter: In a small saucepan over medium heat, melt 7 tablespoons of unsalted butter. Watch as it foams, bubbles, and eventually browns. Stir constantly until it reaches an amber color—be careful not to let it burn. Let it cool completely at room temperature, or chill for quicker cooling.
- Cream the butter and sugar: In a mixing bowl, measure 5 tablespoons of browned butter and combine it with ¾ cup of brown sugar. Beat the mixture until it becomes creamy, which should take about 3 minutes.
- Incorporate the eggs: Add the 2 eggs, one at a time, beating well after each addition. Stir in 1 tablespoon of honey to blend seamlessly.
- Combine the dry ingredients: In a separate bowl, sift together 1 ¾ cups of all-purpose flour, 1 tablespoon of baking powder, ½ teaspoon of salt, ¼ teaspoon of ground ginger, ¼ teaspoon of ground cinnamon, and a pinch of fresh nutmeg.
- Mix wet and dry ingredients: Gradually add the dry ingredients to the butter mixture in three additions, alternating with the ¾ cup of whole milk in two additions. Finally, stir in 1 teaspoon of vanilla extract.
- Fold in the tasty add-ins: Gently mix in the 5 ounces of chopped Medjool dates and the ¾ cup of coarsely chopped walnuts using a spatula. The batter may appear slightly curdled, but that is perfectly normal.
- Pour into the prepared loaf pan: Smooth the top with a spatula for an even bake.
- Bake: Place in the oven and bake for 45 minutes to 1 hour. Check for doneness by inserting a toothpick; it should come out clean.
- Cool and store: Once baked, allow the bread to cool on a wire rack. When ready to store, unmold it and wrap it tightly at room temperature for a few days, or freeze it for a few months.
Tips & Tricks
- Browning the butter: Browning the butter adds a rich flavor to the bread. If you’re new to the technique, keep a close eye on it to prevent burning, as it can happen quickly.
- Testing for doneness: Always insert the toothpick in the center of the loaf to check for doneness. If it comes out with wet batter, give it a few more minutes in the oven.
- Customizing add-ins: Feel free to mix in other nuts, like pecans or almonds, for variety. You can also substitute in different dried fruits like cranberries for a twist.
Serving Suggestions & Pairings
Date and Walnut Bread is delightful on its own, but you can elevate your serving options as well. Enjoy it warm with a pat of butter, or toast slices for a crispy texture. It pairs beautifully with:
- A cup of tea or coffee for breakfast or afternoon snacks.
- Cream cheese or mascarpone spread for a richer indulgence.
- As part of a brunch spread alongside yogurt, honey, and fresh fruits.
- Sliced and served at family gatherings or potlucks.
Nutritional Information
This Date and Walnut Bread recipe contains approximately 150 calories per slice, depending on the thickness of each slice and the specific product brands used. It also includes:
- Fat: About 7g (mostly from the butter and walnuts)
- Carbohydrates: Approximately 20g
- Protein: Roughly 3g
- A good source of fiber from walnuts and dates.
Balancing indulgence with nutrition, this bread can fit well into various meal plans, especially when enjoyed with mindful portions.
Storing Tips & Variations
For optimal freshness, store your Date and Walnut Bread in an airtight container at room temperature for up to three days. If you want to keep it longer, it freezes beautifully. Simply wrap it tightly in plastic wrap and foil to prevent freezer burn, storing it for up to three months. When you’re ready to enjoy, let it thaw in the refrigerator overnight and reheat it in the oven to regain its original warmth and texture.
Variations:
- Gluten-Free: Substitute all-purpose flour with a gluten-free blend designed for baking.
- Sugar-Free: Experiment with alternative sweeteners if you need a sugar-free option, but keep in mind the final texture may vary.
- Flavor Additions: You can add orange zest or lemon zest for a citrusy twist or even some chocolate chips for a sweet treat.
Conclusion
Date and Walnut Bread is more than just a recipe; it encapsulates the warmth of home and the joy of sharing. Its combination of flavors and textures makes it a timeless treat that can be easily crafted in your kitchen. Don’t hesitate to try this recipe for yourself, and join a tradition that’s bound to delight your taste buds. We encourage you to share your baking experiences and any personal touches you add to this beloved recipe!
FAQs
1. Can I use other types of dates?
Medjool dates are recommended for their softness and plumpness. Other varieties may not provide the same texture and sweetness.
2. Can I use salted butter instead of unsalted?
While it’s better to use unsalted butter to control the salt content, using salted butter is fine if that’s what you have on hand. Just omit the ½ teaspoon of added salt.
3. How can I ensure my bread rises properly?
Make sure your baking powder is fresh, and don’t overmix your batter once the dry ingredients are combined, which can lead to denser bread.
4. Can I make the batter ahead of time?
It’s best to bake the batter fresh for optimal texture and flavor. If you need to prepare ahead, mix the wet and dry ingredients separately and combine them just before baking.
5. What should I do if my bread sinks in the middle?
A sinking loaf may indicate that your oven temperature was too low, or the batter was overmixed. Make sure to follow all temperature and mixing instructions closely next time.
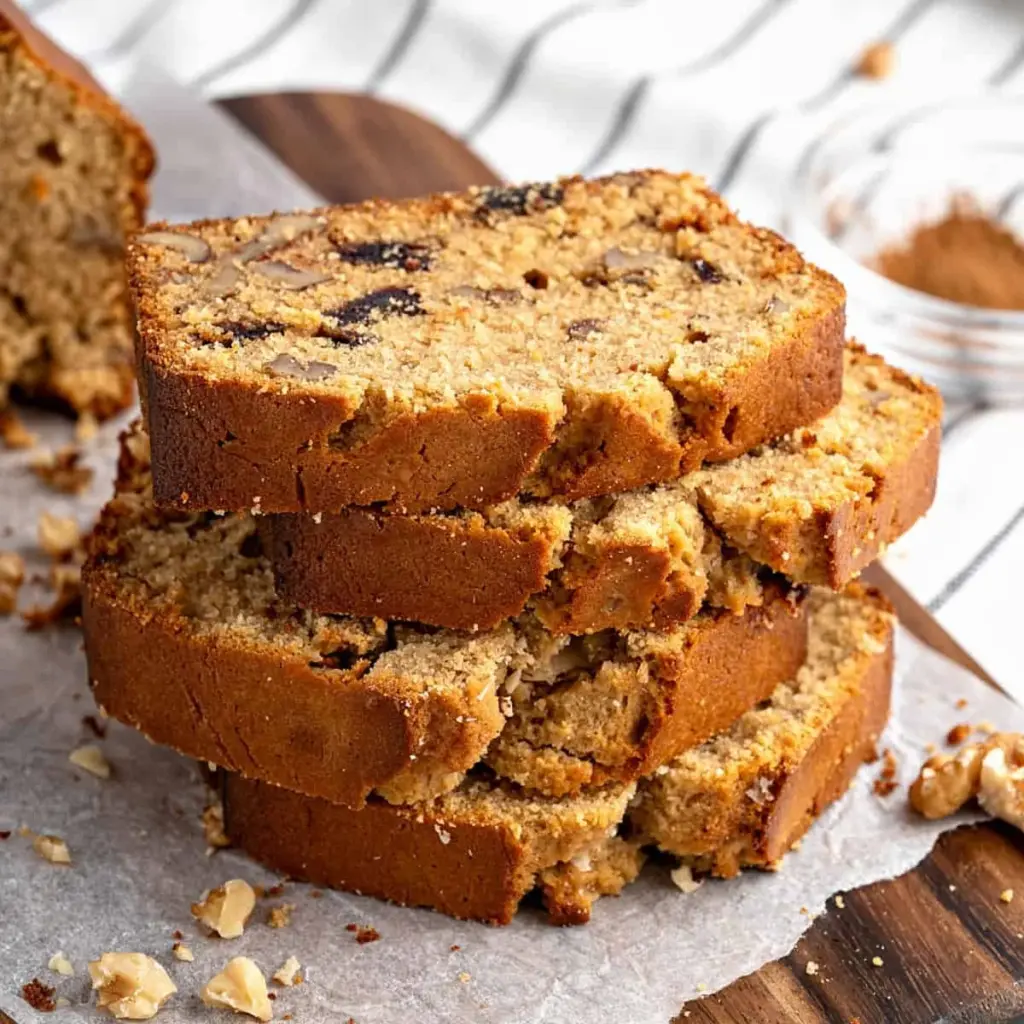
Date and Walnut Bread
Ingredients
Method
- Preheat your oven to 350ºF (180°C).
- Grease a non-stick 8×4-inch loaf pan and line it with parchment paper.
- In a small saucepan, melt the unsalted butter over medium heat until browned. Allow it to cool.
- In a mixing bowl, combine the browned butter and brown sugar, then beat until creamy.
- Add eggs one at a time, mixing well after each addition. Stir in honey.
- Sift together flour, baking powder, salt, ginger, cinnamon, and nutmeg in a separate bowl.
- Gradually add the dry ingredients to the butter mixture alternating with milk, ending with dry ingredients.
- Stir in the vanilla extract.
- Gently fold in chopped Medjool dates and walnuts.
- Pour the batter into the prepared loaf pan and smooth the top.
- Bake for 45 minutes to 1 hour, or until a toothpick comes out clean.
- Cool on a wire rack before storing.



Leave a Reply